Admin Web User Guide

What is the Admin Web
The Pazzk Admin Web is a web-based tool developed to simplify and automate the initial configuration process of chargers.
Operating an EV charger is not simply about managing charging sessions. The real work of an operator begins even before the charger is installed on site and continues throughout its long lifecycle until it is dismantled or replaced.
In general, during the operational phase, CPOs use a CSMS (Charging Station Management System) to control, bill, and manage sessions. However, CSMS is a system designed under the assumption that the charger already satisfies the following conditions:
- Properly connected to the network
- Identifier and authentication information correctly injected
- Basic configuration completed and ready for immediate operation
The problem is that the process of meeting these prerequisite conditions lies outside the responsibility scope of the CSMS. And it is precisely at this point that additional cost and risk inevitably arise.
Operational Reality: Costs Are Concentrated in the Early Stage
The stage where the greatest cost and uncertainty arise in the charger lifecycle is before the operational phase.
- Network configuration after on-site installation
- Injection of charger identifiers and authentication information
- Configuration of endpoints and parameters for CSMS integration
- Initial functional check and commissioning
This process often relies on the following approaches:
- Vendor-specific configuration tools
- Manual input through local UI access
- Repeated visits by field engineers
When the number of chargers is small, this approach does not pose a major problem.
However, as the scale of operation increases, the cost structure deteriorates rapidly.
- Increased initial installation cost per charger
- On-site revisits required when configuration errors occur
- Inability to scale workforce when expanding geographically
- Installation delays → operational delays → revenue delays
From an operational perspective, this is not merely an inconvenience but a structural cost issue.
Risk: The Real Problem Is Not “Configuration” but “Lack of State Visibility”
A more serious issue than cost is the invisibility of risk. In the conventional approach, it is difficult to immediately answer the following questions:
- What is the current configuration state of this charger?
- When, by whom, and with what values was the configuration changed?
- How can we distinguish whether a field issue is caused by configuration or hardware?
As configuration becomes more distributed and manually managed,
- Configuration history is not recorded
- State information exists only on site
- Issue response relies on experience and assumptions
As operational scale increases, this directly leads to longer incident response times, unclear accountability, and increased risk of SLA violations.
Scaling Pressure: What Works for 10 Units Breaks at 1,000
Charger operations do not scale linearly.
- Up to 10 units, Excel sheets and manual configuration are manageable.
- From 100 units, variations in installation quality begin to appear.
- Beyond 1,000 units, no one can explain “who did what, and when.”
At this point, the problem is not a shortage of personnel.
It is that the structure no longer allows anyone to produce consistent results, no matter who is assigned.
Operators eventually face the following choices:
- Deploy more field personnel
- Accept a decline in operational quality
- Change the initial system design itself
The Admin Web is a tool designed to make the third option possible.
The Role of the Pazzk Admin Web: Structuring the Pre-Operational Stage
The Pazzk Admin Web does not replace the CSMS.
Instead, it takes responsibility for the steps that must precede the proper functioning of the CSMS.
The scope handled by the Admin Web is clearly defined:
- The stage of transitioning a charger into an operational state
- The most unstable and cost-intensive phase in the charger lifecycle
- The area where automation and centralization deliver the greatest impact
Administrators centrally define the essential operational information within the Admin Web.
After power is applied and network connectivity is established, the charger automatically retrieves this information and completes its initial provisioning.
This enables the following:
- Minimization of manual on-site configuration
- Centralized management of configuration history
- Reapplication of configuration changes without site revisits
- Rapid recovery through reprovisioning when issues occur
This is not merely a convenience feature, but an approach to transforming operational costs into a controllable structure.
Sign Up and Login
Access the Admin Web at: https://admin.pazzk.net.
Click the Sign Up button at the bottom to navigate to the registration page.

Enter the issued registration code, fill in your email and name, and click the Sign Up button.
Once registration is complete, your account will be placed in a pending approval state. You will receive an email notification once approval is granted.
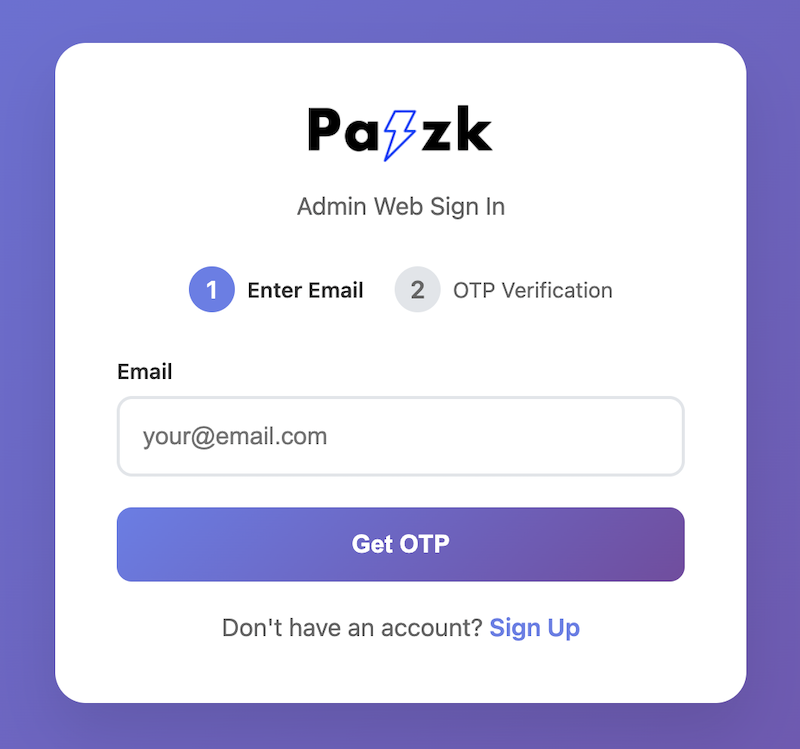
After approval, return to the login page, enter your email, and click the Get OTP button.
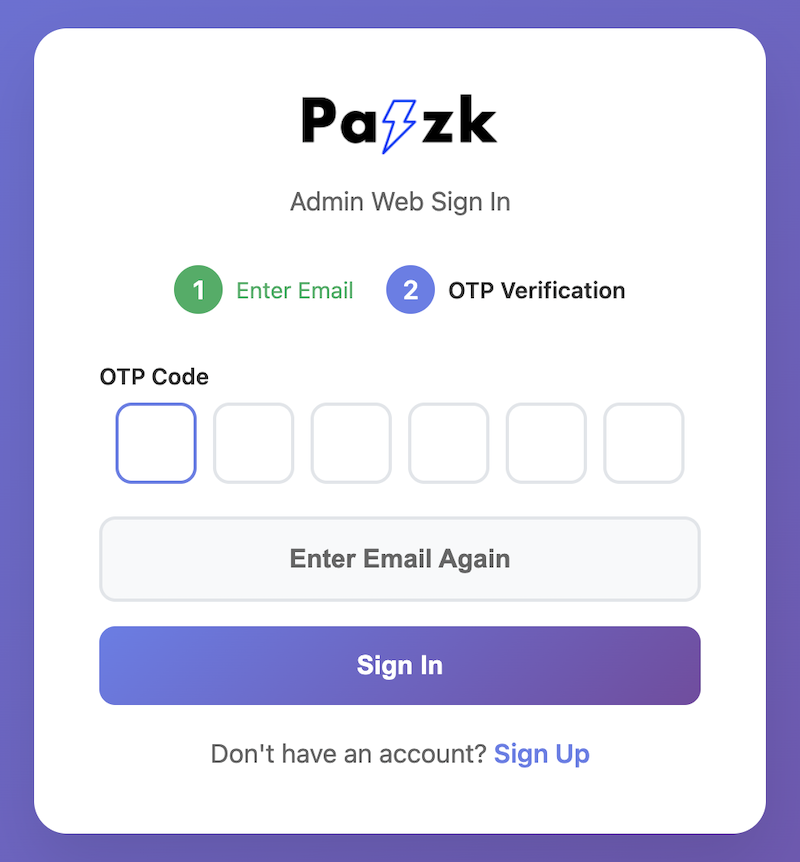
Enter the OTP code sent to your email and click the Sign In button to log in.
Note
There is no password. Login is performed using only the email address and OTP code.
After logging in, the dashboard screen will appear.
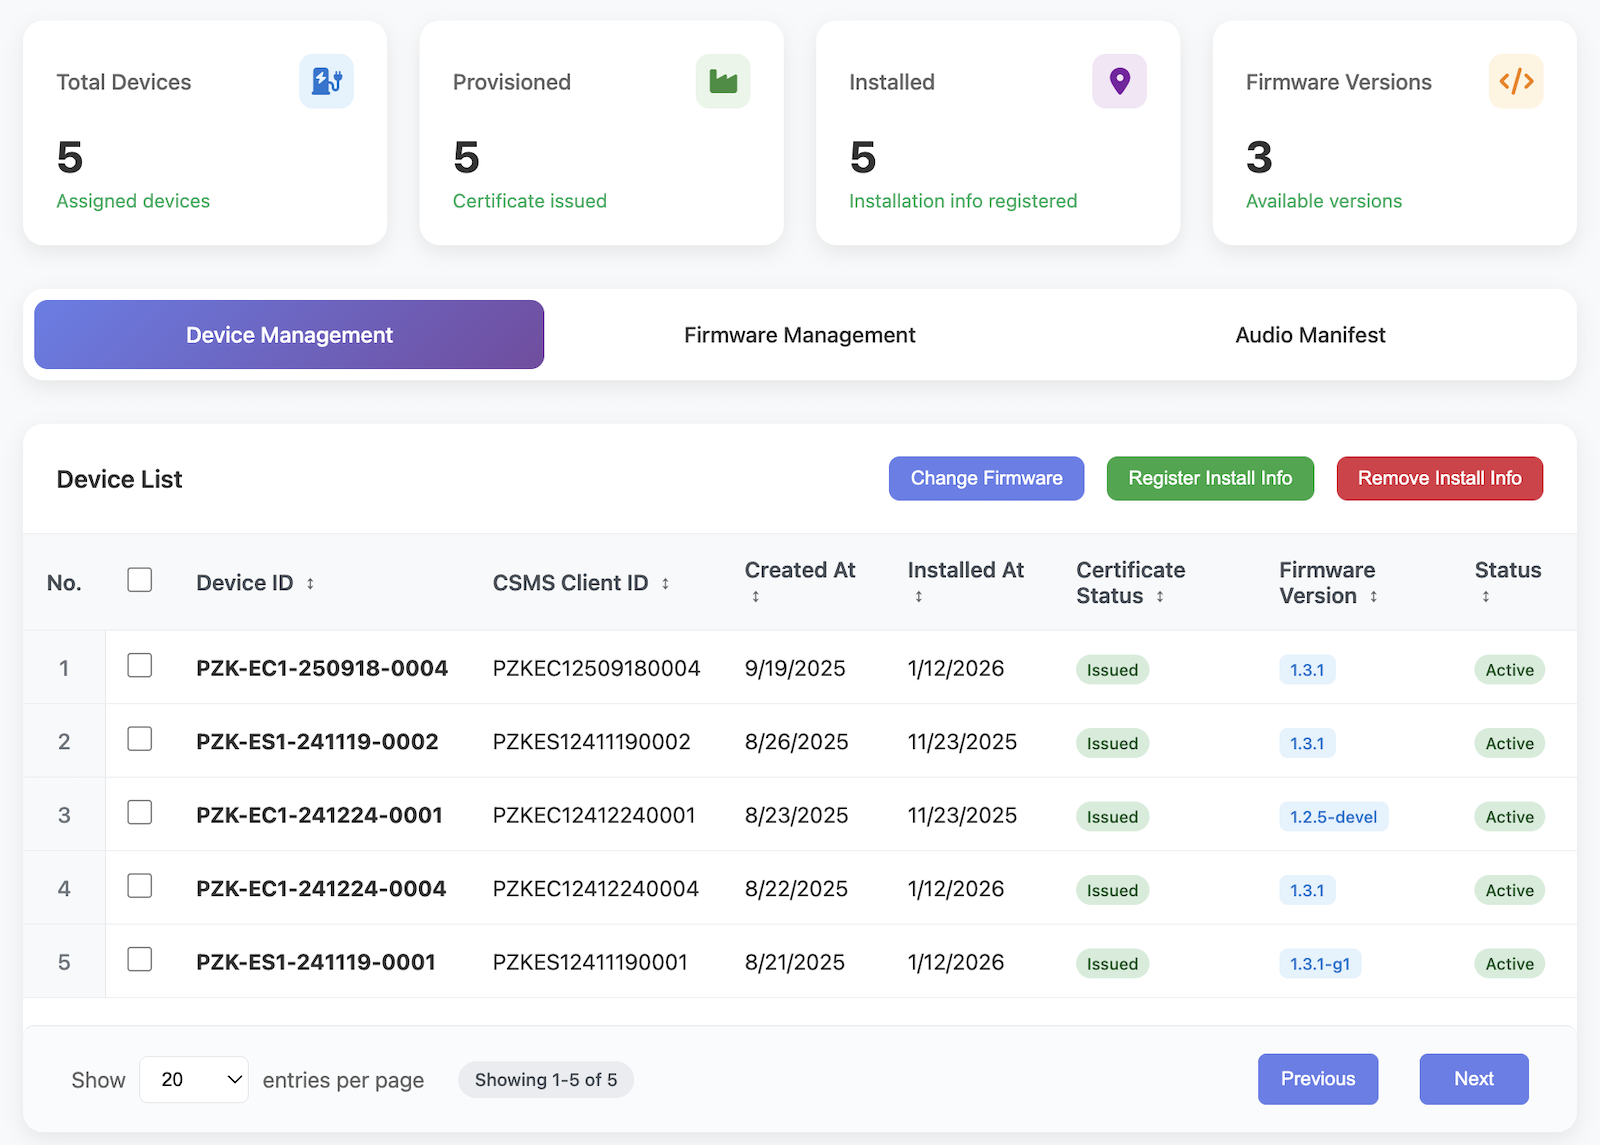
The cards at the top summarize the following information:
- Total number of registered chargers
- Number of provisioned chargers
- Number of chargers with installation information registered
- Number of registered firmware versions
The Admin Web provides three main management functions:
- Charger Management
- Firmware Management
- Audio Management
Device Management
The Device Management tab displays a list of registered chargers. You can select each charger to view and manage its detailed information.
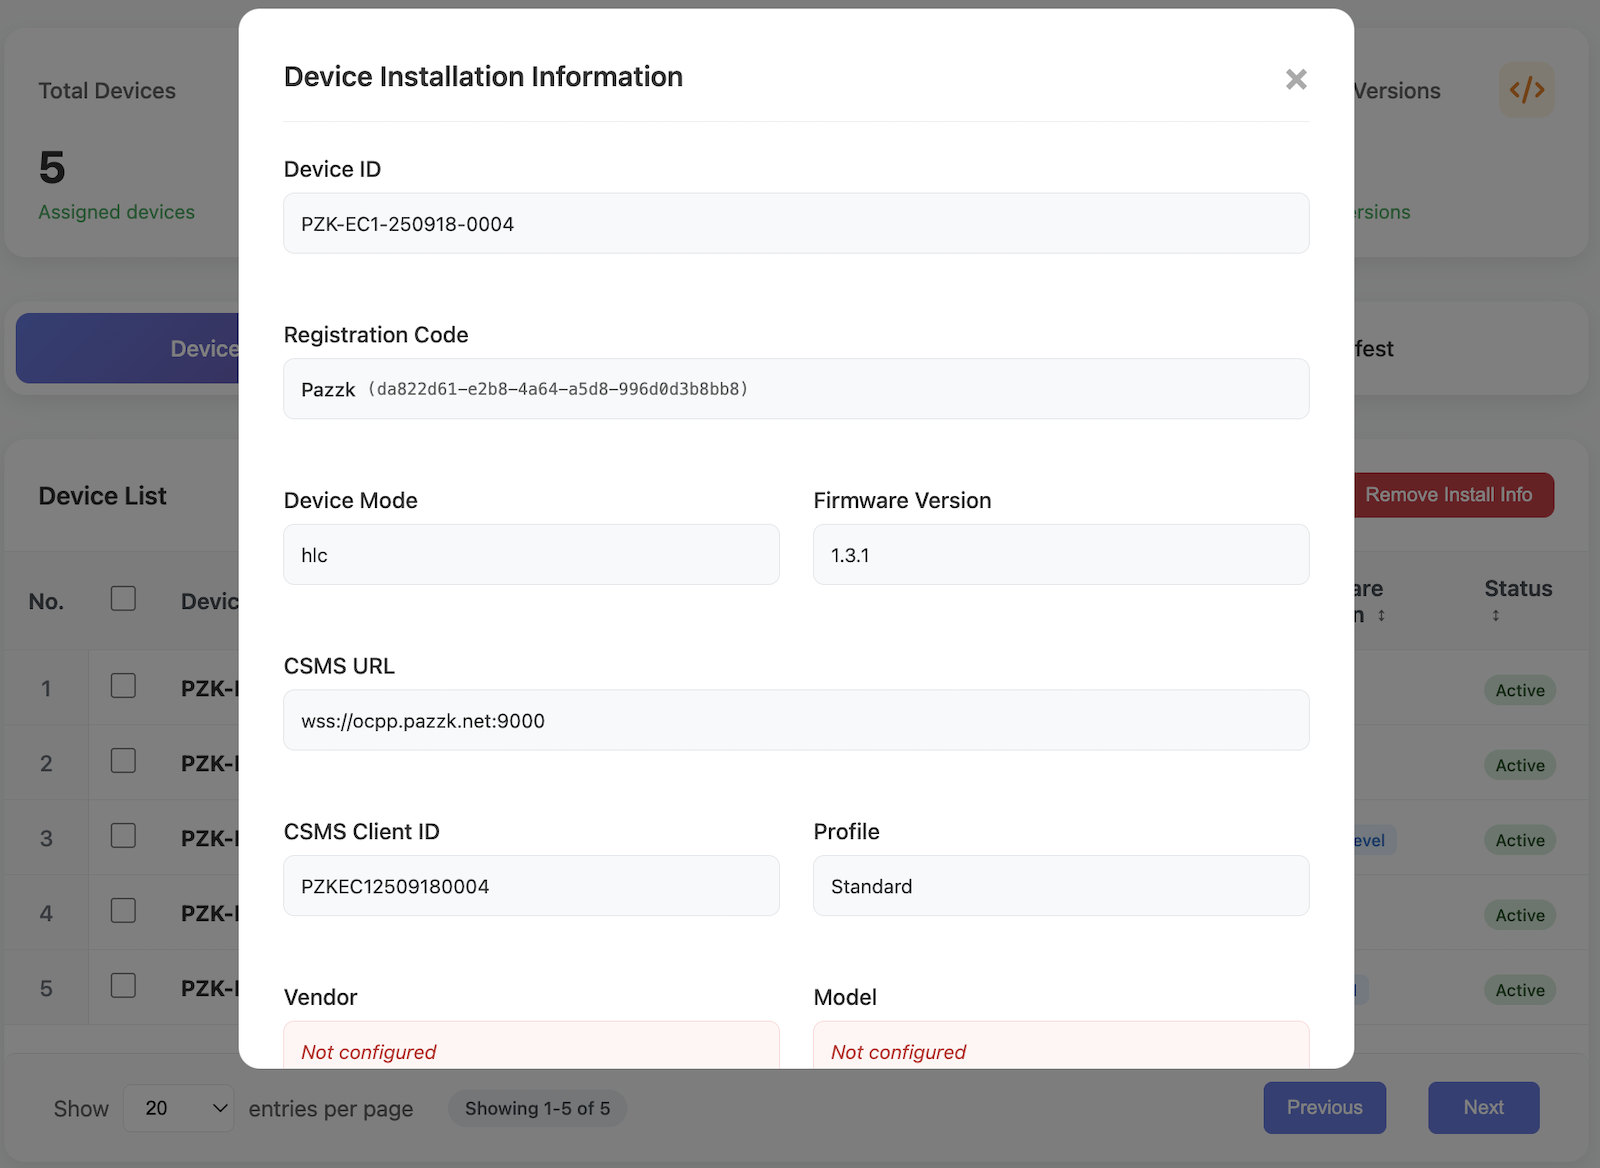
Entering Installation Information
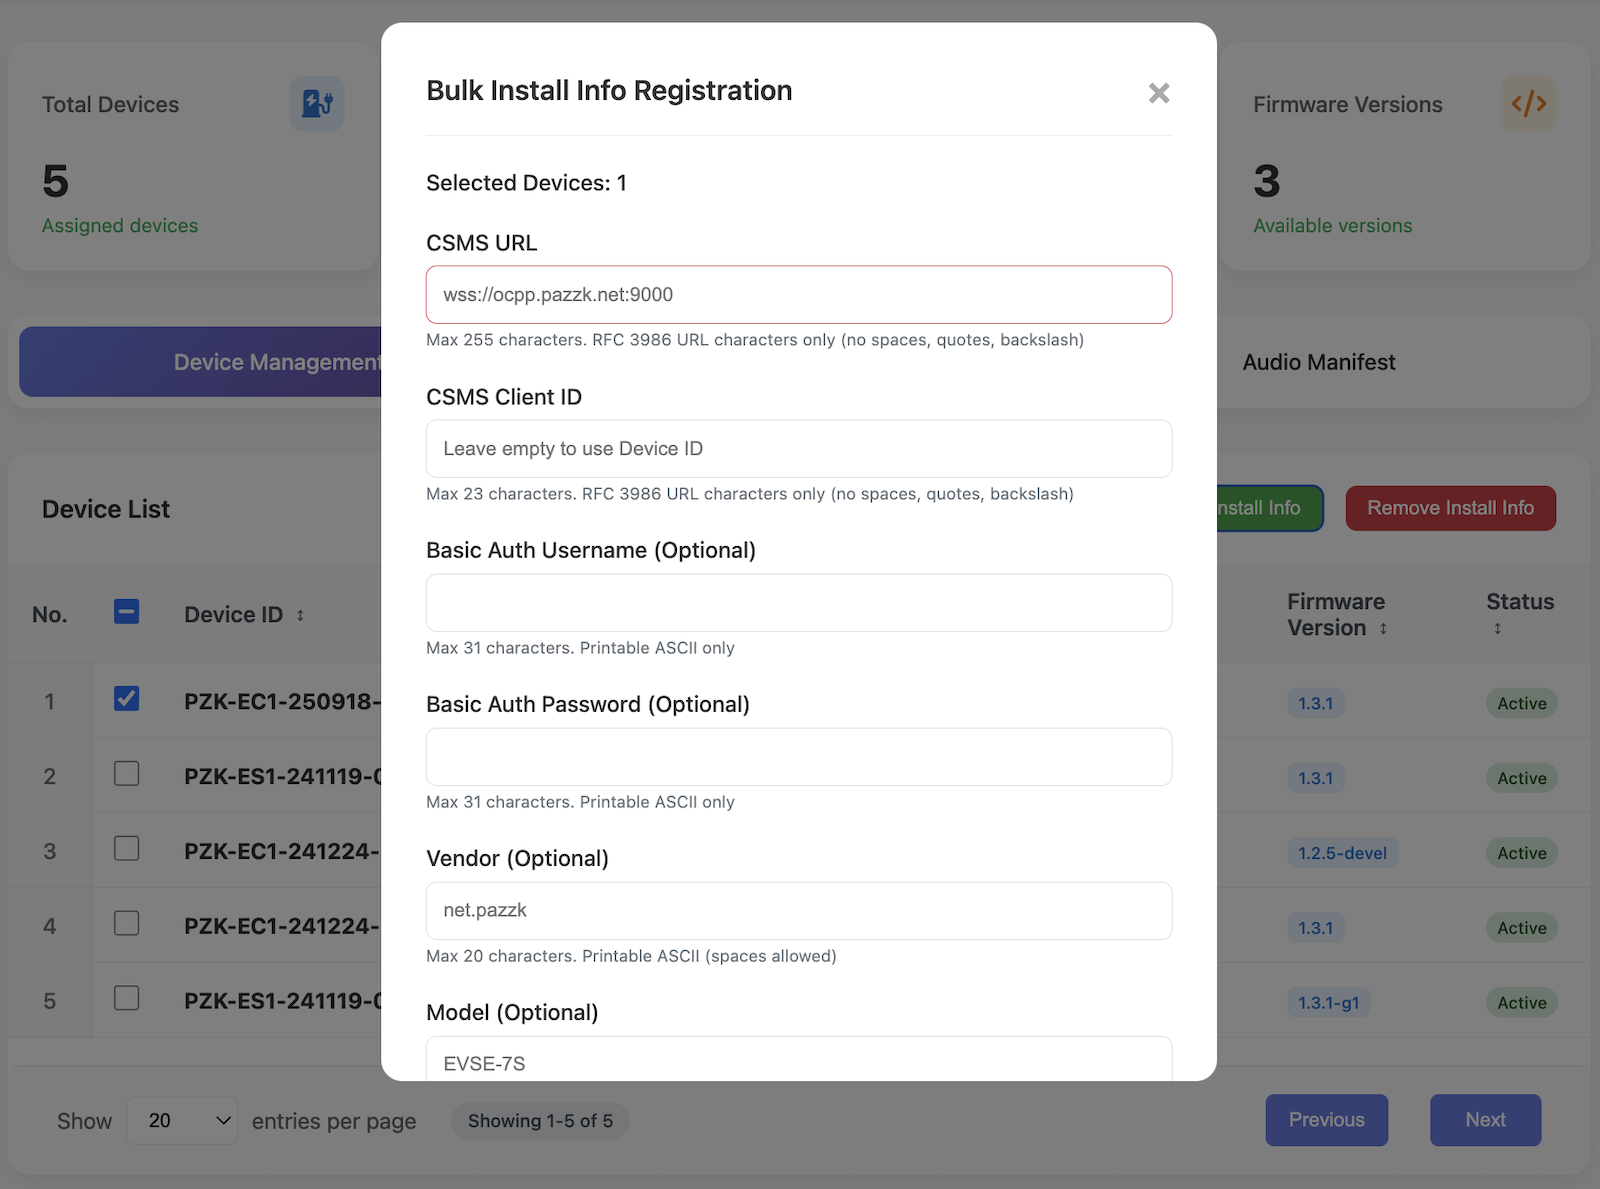
For chargers without installation information registered, click the Register Install Info button at the top right to enter the details. To register multiple chargers at once, select the checkboxes on the left side of the charger list and then click the Register Install Info button at the top.
Note
The entered installation information is automatically used for provisioning once the charger connects to the network.
The required installation information is as follows:
| Field | Description |
|---|---|
| CSMS URL | Endpoint URL of the CSMS to operate with |
| CSMS Client ID | Client identifier for CSMS integration |
| Basic Auth Username | Basic Auth username for CSMS authentication |
| Basic Auth Password | Basic Auth password for CSMS authentication |
| Vendor | Charger manufacturer string |
| Model | Charger model string |
| Profile | Profile identifier to support CPO-specific customized OCPP protocols |
| Device Mode | Charger authentication method |
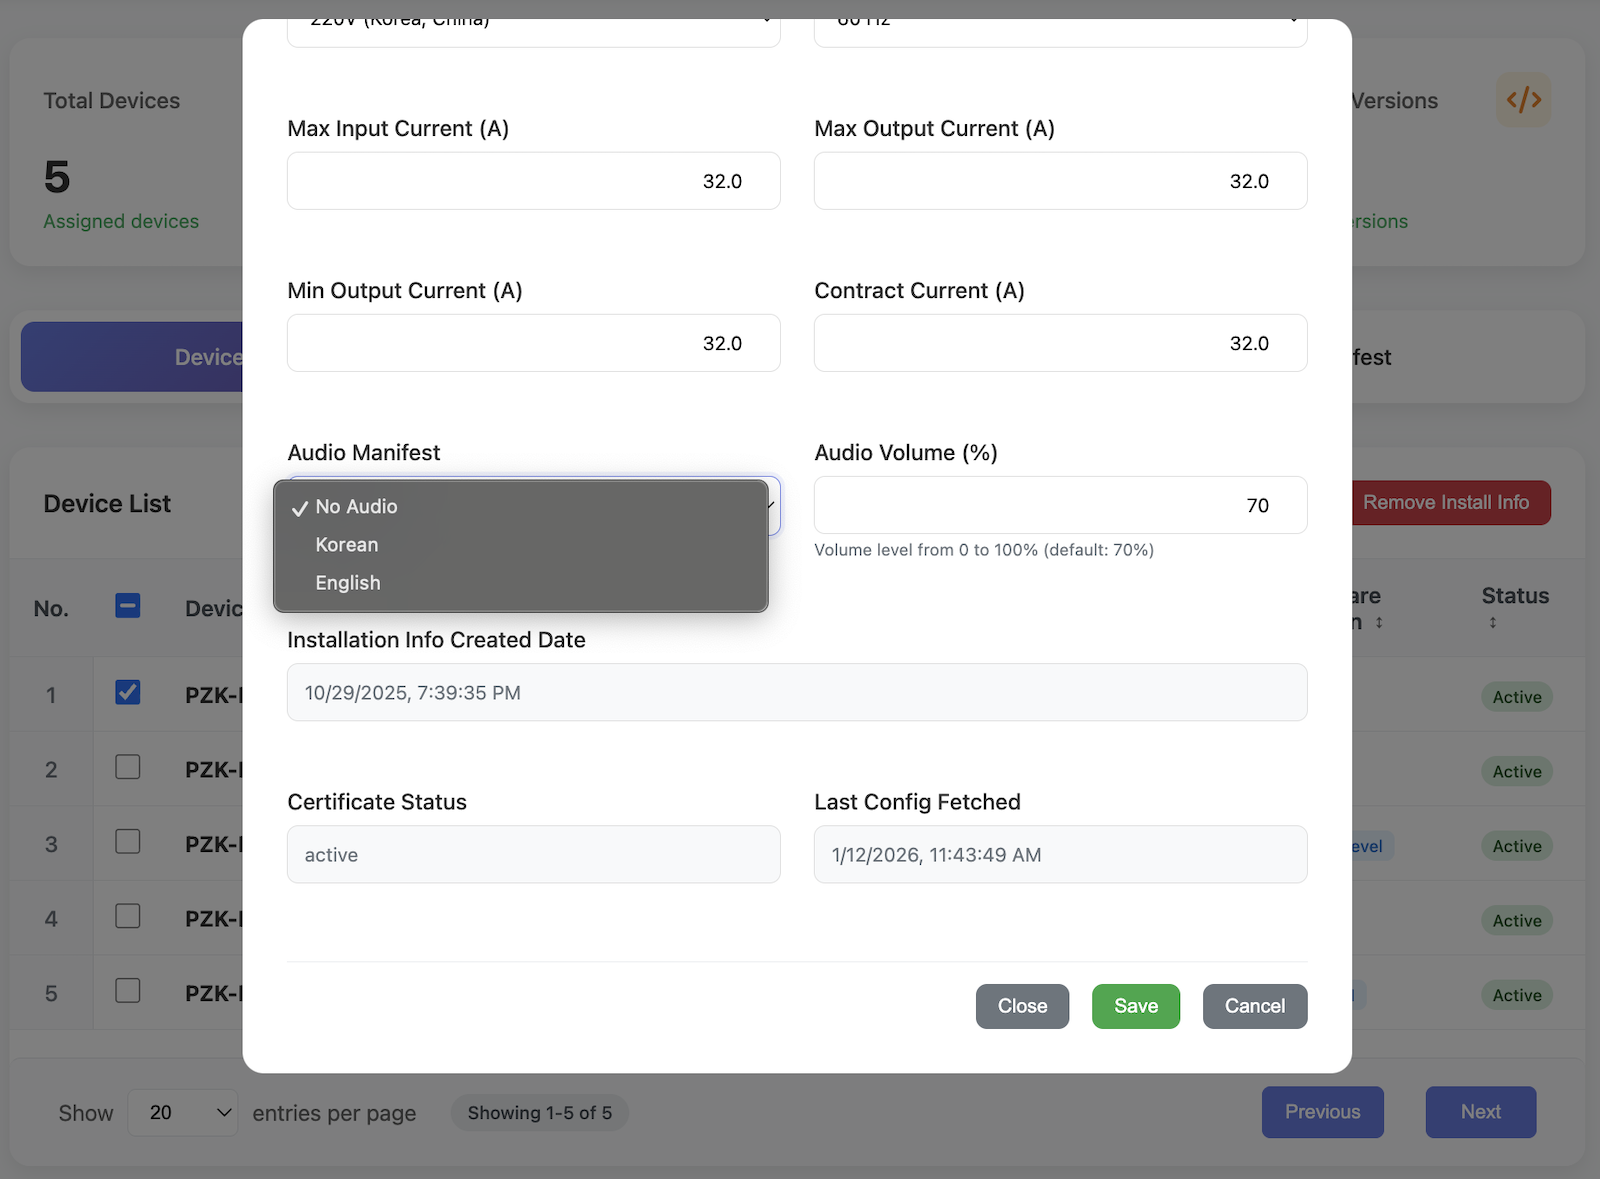
| Max Input Current | Maximum input current |
| Input Voltage | Input voltage |
| Input Frequency | Input frequency |
| Max Output Current | Maximum output current |
| Min Output Current | Minimum output current |
| Contract Current | Contract current |
| Audio Manifest | Voice guidance configuration |
| Audio Volume | Voice guidance volume |
The Profile field is used to support customized OCPP protocols for different CPOs. Select the profile that matches the CSMS you will operate with.
The charger operating mode can be selected from the following options:
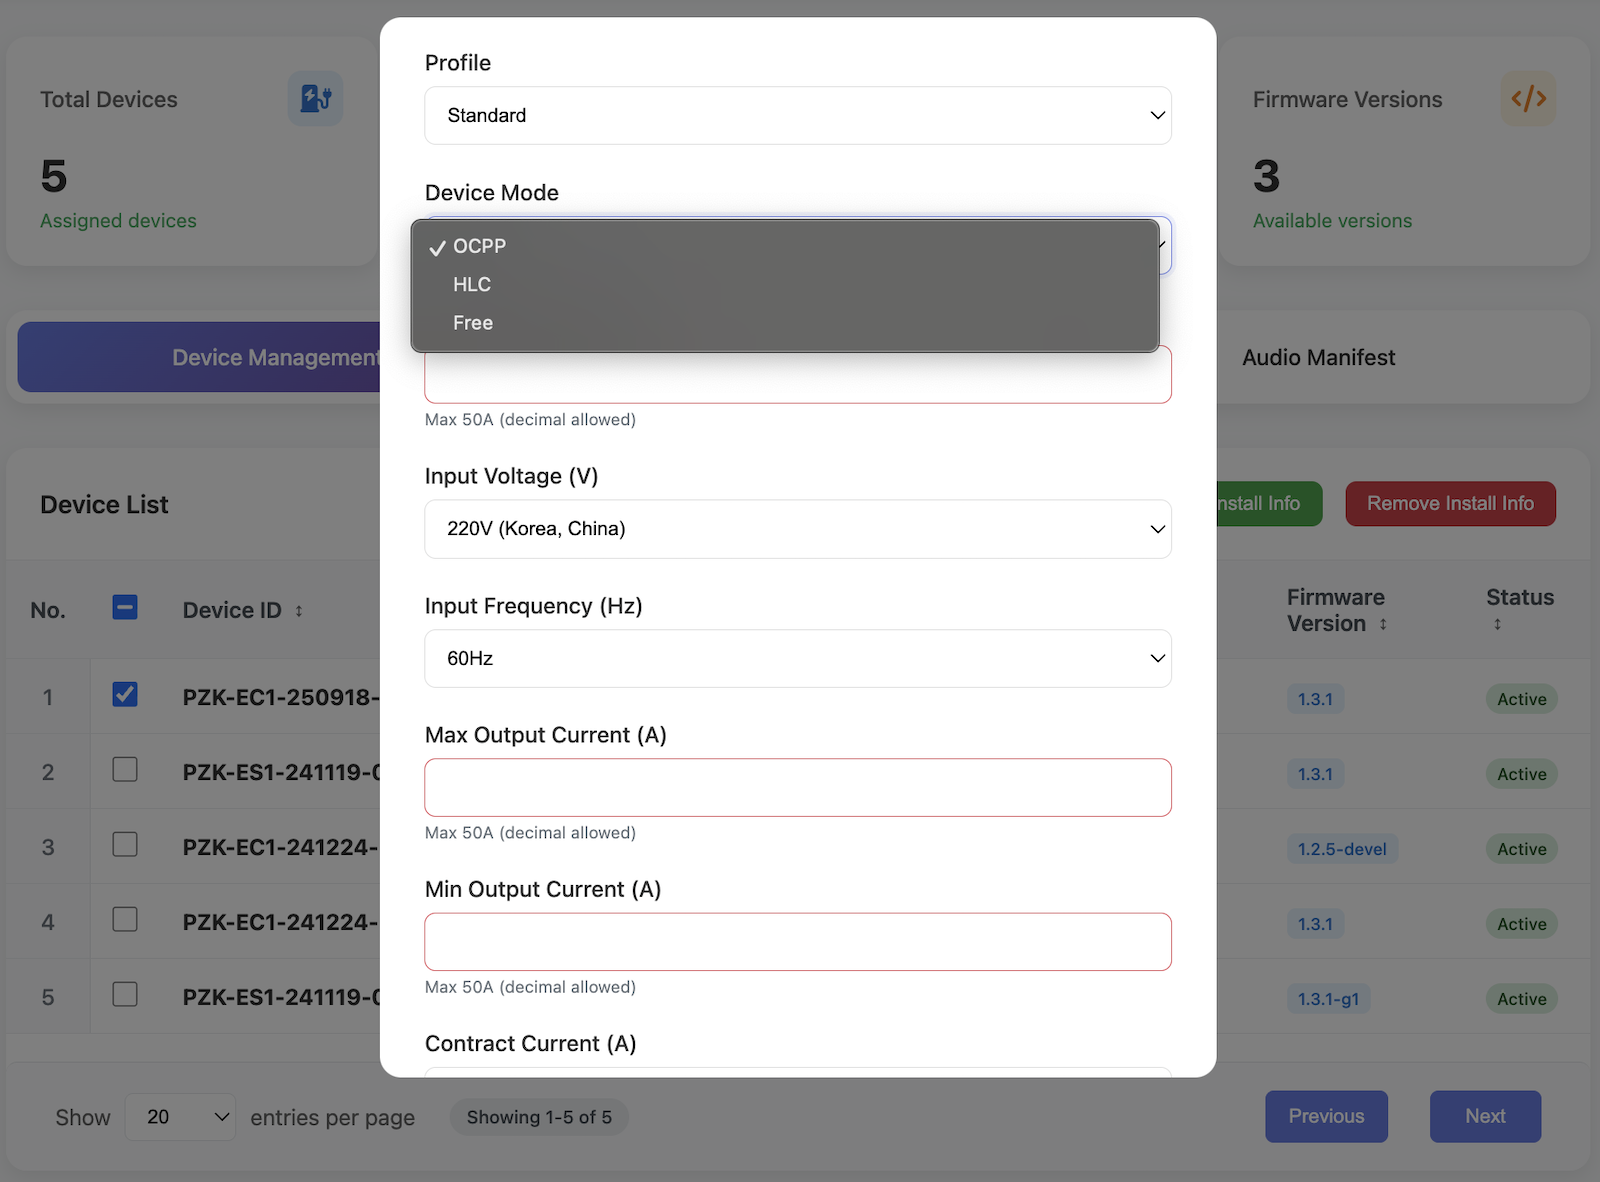
| Option | Authentication Method | Description |
|---|---|---|
| OCPP | Backend Authentication Method | Uses OCPP to handle authentication and payment between the charger and backend server |
| HLC | Automatic Authentication Method | Vehicle and charger perform automatic authentication and payment based on ISO 15118 |
| Free | Non-Authenticated Method | Charging starts when the vehicle is connected to the charger without any authentication |
To update the charger firmware, click the Change Firmware button.
Firmware Management
In the Firmware Management tab, you can view the registered firmware versions.

Note
The registered firmware version is automatically updated on the charger during provisioning.
Audio Manifest
Use the Audio Manifest tab to manage voice guidance.
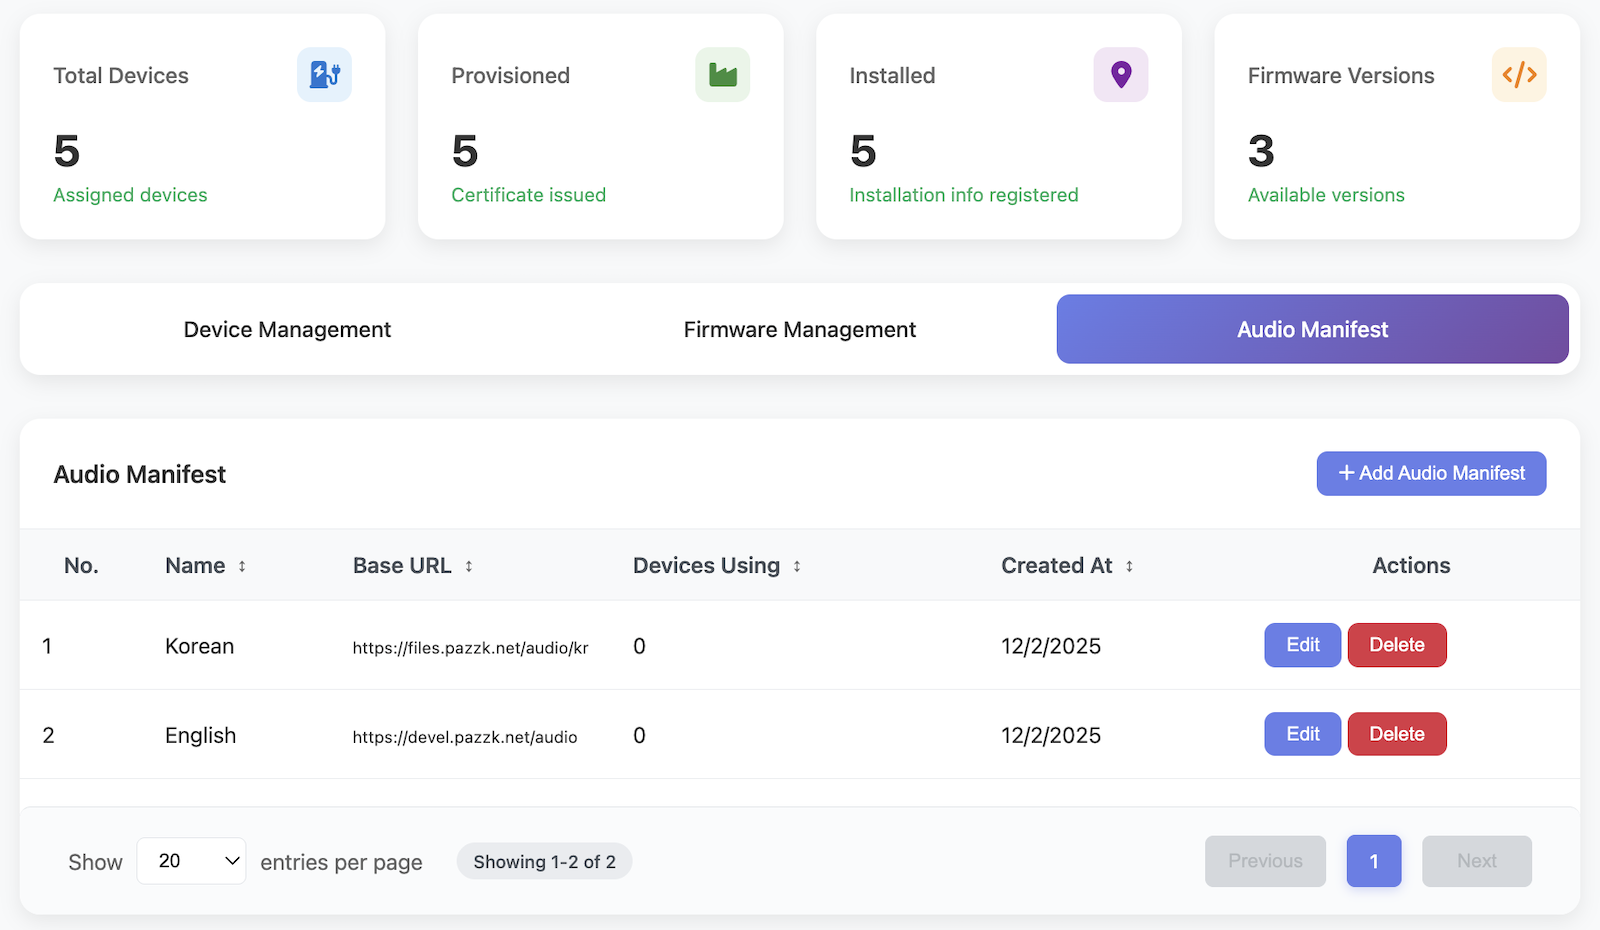
To register a new voice guidance set, click the Add Audio Manifest button at the top right.

Enter a name in Name to serve as an identifier, and provide a description of the voice guidance in Description.
In Base URL, enter the base URL where the audio files are stored.
Each audio file is specified as a relative path based on the Base URL.
Audio files with the Enabled option activated are automatically downloaded and used during charger provisioning.
Note
Only PCM format is currently supported for voice guidance files.
You can change the voice guidance per charger from the charger list. In the charger detail screen, click the Audio Manifest dropdown and select the desired voice guidance.